Find nearby trailheads for beginner-friendly hiking trails? Sounds like a recipe for adventure, not a grueling Everest expedition! This isn’t about conquering mountains; it’s about embracing nature’s gentle slopes and discovering the joy of a well-earned trail mix break. We’ll guide you through finding those perfect paths – the kind where breathtaking views don’t require a sherpa or a death wish.
Prepare to ditch the couch and embrace the surprisingly easy thrill of hiking!
This guide is your passport to discovering local trails perfect for novice hikers. We’ll cover everything from identifying beginner-friendly trails (think “gentle incline” not “vertical climb”) to using handy online tools to locate them. We’ll also arm you with essential safety tips and post-hike recovery strategies (because even beginner hikes deserve a celebratory nap!). Get ready to trade your screen time for some seriously awesome trail time.
Understanding Beginner-Friendly Hiking Trails
So, you’re ready to ditch the couch and embrace the great outdoors? Fantastic! But before you conquer Everest (or even that slightly-less-impressive hill in your backyard), let’s talk about beginner-friendly hiking trails. These aren’t just for rookies; they’re perfect for anyone wanting a gentle introduction to the joys of hiking, regardless of fitness level. Think of them as the training wheels of the trail world – helping you build confidence and stamina before tackling more challenging routes.Beginner-friendly trails offer a gentler introduction to the world of hiking, ensuring a positive and enjoyable experience for newcomers.
They’re designed to minimize physical strain and maximize the sense of accomplishment, leaving you eager for more adventures in the wilderness. This careful design allows hikers to appreciate the beauty of nature without the overwhelming challenge of strenuous climbs or treacherous terrain.
Characteristics of Beginner-Friendly Trails
Beginner-friendly trails are characterized by their manageable distance, minimal elevation gain, and relatively smooth terrain. Generally, these trails are shorter, often less than 5 miles, and feature minimal changes in elevation. Steep inclines and declines are avoided, and the trail surface is usually well-maintained and relatively flat. Imagine strolling through a park, but with slightly more exciting scenery.
For example, the popular “Easy Street Trail” in many regional parks typically fits this description, boasting a gentle, mostly flat path under two miles long. In contrast, the infamous “Death Valley Challenge Trail” (hypothetical, but you get the idea!) would definitely
not* be considered beginner-friendly.
Features that Enhance Beginner-Friendliness
Well-maintained paths are key. Think clearly defined trails with minimal obstacles like fallen branches or slippery rocks. Clear signage is also crucial; imagine being able to follow a trail without constantly consulting a map – pure bliss! Regularly spaced markers showing distance and direction reduce stress and anxiety. Finally, readily available water sources – whether natural springs or conveniently placed water fountains – prevent dehydration and make the hike even more enjoyable.
Picture this: you’re halfway through your hike, feeling thirsty, and BAM! A refreshing stream appears, just as nature intended.
Beginner Trails versus Intermediate/Advanced Trails, Find nearby trailheads for beginner-friendly hiking trails
The differences between beginner, intermediate, and advanced trails are quite significant. Beginner trails prioritize ease and accessibility, focusing on short distances, minimal elevation changes, and well-maintained paths. Intermediate trails increase the challenge slightly, with longer distances, moderate elevation gain, and potentially some more rugged terrain. Advanced trails, on the other hand, are for experienced hikers only, demanding high levels of fitness, navigation skills, and often requiring specialized gear.
They typically involve significant elevation gain, potentially dangerous terrain, and require extensive preparation and planning. Think of it like this: beginner trails are like a leisurely walk in the park, intermediate trails are a brisk jog through the countryside, and advanced trails are a full-blown marathon up a mountain.
Locating Nearby Trailheads: Find Nearby Trailheads For Beginner-friendly Hiking Trails
So, you’re ready to ditch the couch and embrace the great outdoors, but finding that perfect beginner-friendly trail can feel like searching for a needle in a haystack (a very, very large, wooded haystack). Fear not, intrepid hiker-to-be! Locating nearby trailheads is easier than you might think, and we’re here to guide you through the wilderness of information.Finding your perfect hiking spot involves a bit of detective work, but with the right tools, it’s a breeze.
Think of it as a treasure hunt, but instead of gold, you’ll find breathtaking views and the satisfying crunch of leaves underfoot. We’ll explore several methods to help you uncover hidden hiking gems near you.
Methods for Finding Nearby Trailheads
There are several ways to sniff out those trailheads. You can leverage the power of the internet (because, let’s face it, the internet knows everything), consult the wisdom of experienced hikers (they’ve already conquered the terrain!), or tap into the local knowledge of experts. Each method has its own advantages, offering a different flavor of trail-finding adventure.
Using Online Mapping Tools
Online mapping tools are your digital Sherpas, guiding you through the virtual mountains to find the perfect trail. These tools typically allow you to filter searches by difficulty, distance, and elevation gain, ensuring you find a trail that matches your fitness level and ambitions. For example, using Google Maps or AllTrails, you can input your location and specify “easy hiking trails” within a certain radius.
The map will then display various options, complete with trail length, elevation change, and often user reviews, allowing you to make an informed decision. Imagine: no more guessing games, just a clear, concise map leading you to hiking bliss.
A Simple Guide to Using Online Mapping Tools for Trail Search
1. Input your location
Start by entering your current address or location into the search bar.
2. Specify search parameters
Use filters to narrow your search. Look for options to filter by difficulty (easy, moderate, hard), distance, elevation gain, and trail type (loop, out-and-back).
3. Review trail details
Once you’ve found a few potential trails, check user reviews, photos, and trail descriptions to get a better sense of what to expect. Pay attention to things like trail maintenance and potential hazards.
4. Check trail conditions
Get the entire information you require about dog-friendly hiking trails near me with shaded areas on this page.
Some mapping tools provide real-time updates on trail conditions, such as closures or recent weather impacts. This is crucial for planning a safe and enjoyable hike.
5. Save your favorite trails
Many apps allow you to save your favorite trails for easy access later. This is especially helpful if you’re planning multiple hikes.
Resources for Finding Hiking Trails
Getting ready to embark on your digital trailhead hunt? Here are some invaluable resources to equip you for success.
Websites and Apps:
- AllTrails: A comprehensive database of trails with user reviews, photos, and maps.
- Hiking Project: Another excellent resource with detailed trail information and user-generated content.
- Gaia GPS: A more advanced app geared towards serious hikers, offering offline maps and GPS tracking.
- Google Maps: While not solely dedicated to hiking, Google Maps can be surprisingly effective for finding trails, especially when combined with searches.
Books:
- Local hiking guides: Many regions have guidebooks specifically dedicated to their local trails. These often include detailed trail descriptions, maps, and helpful tips.
- National Geographic Trails Illustrated Maps: These detailed maps provide topographic information, trail markings, and points of interest.
Trailhead Information & Accessibility
So, you’ve found your perfect beginner-friendly trail – congratulations, intrepid explorer! But before you lace up those hiking boots and unleash your inner mountain goat, there’s a crucial step: understanding the trailhead itself. Think of the trailhead as the gateway to adventure – and a well-informed gateway is a safe and enjoyable one.Trailheads are more than just a place to park your car; they’re information hubs packed with crucial details to make your hike a success.
Ignoring these details is like embarking on a treasure hunt without a map – you might find treasure, but you might also find yourself hopelessly lost, hungry, and wishing you’d packed more snacks (and maybe a compass).
Essential Trailhead Information
Trailheads often provide vital information to ensure a smooth and safe hiking experience. This usually includes parking availability (crucial to avoid a frustrating drive around a packed lot), clearly marked trail maps (to prevent unexpected detours into the wilderness), and safety information (covering everything from wildlife encounters to emergency contact details). Some trailheads even have helpful things like restrooms (a hiker’s best friend!), water fountains (hydration is key!), and information boards detailing trail conditions and any recent updates.
Knowing what to expect at the trailhead will greatly enhance your hiking experience.
Checking Trail Conditions and Weather Forecasts
Before you even think about stepping onto the trail, checking the weather forecast and trail conditions is non-negotiable. Ignoring this advice is like setting sail without checking the wind – you might get lucky, but the chances of a rough ride are significantly higher. Websites, apps, and local ranger stations often provide up-to-the-minute reports on trail closures, hazardous conditions (like washed-out paths or slippery rocks), and, of course, the weather.
A sudden thunderstorm can turn a pleasant hike into a soggy, stressful ordeal, so always be prepared. Imagine this: you’re halfway up a mountain, the sky turns black, and you’re caught in a downpour without proper gear. Not fun. Checking the forecast can save you from such misadventures.
Example Trailhead Information
Here’s a table showcasing the kind of information you might find at different trailheads. Remember, these are just examples – always check the specific trailhead for the most up-to-date details.
| Trail Name | Difficulty | Distance (miles) | Parking |
|---|---|---|---|
| Whispering Pines Trail | Easy | 2.5 | Small lot, often full on weekends |
| Rocky Ridge Ramble | Moderate | 4.0 | Large lot with overflow parking |
| Summit Seeker’s Path | Difficult | 7.0 | Limited parking, carpooling recommended |
| Gentle Brook Stroll | Easy | 1.0 | Street parking available |
Safety Considerations for Beginners
Hitting the trail is awesome, but let’s be real, Mother Nature isn’t always a cuddly kitten. Beginner hikers need to be aware of potential dangers to enjoy their adventures safely and return home with all their limbs (and sanity) intact. This section covers some crucial safety aspects to keep in mind before you even lace up those hiking boots.Potential Hazards on Hiking Trails
Wildlife Encounters
Wildlife encounters can range from mildly annoying (a squirrel stealing your granola bar) to seriously concerning (a grumpy bear protecting its cubs). Knowing what to do in various situations is key. For example, if you encounter a bear, remember the acronym “BEAR”: Be aware of your surroundings, Encounter from a distance, Act calmly and avoid eye contact, and Retreat slowly.
Similarly, knowing how to react to snakes (give them space!) or other animals will improve your safety. Always carry bear spray in bear country and know how to use it effectively. Remember, respecting wildlife’s space is paramount to a safe and enjoyable hike.
Weather Changes
Mountain weather can change faster than a politician’s stance. One minute you’re basking in sunshine, the next you’re battling a blizzard. Sudden downpours, thunderstorms, and rapid temperature drops can all pose significant risks. Always check the forecast before you go and be prepared for anything. Pack layers of clothing, waterproof gear, and consider carrying a lightweight emergency blanket.
A sudden hailstorm can turn a pleasant afternoon hike into a soggy, shivering experience, so preparedness is key.
Injuries
Trips, slips, and falls are common occurrences on uneven trails. Ankle sprains, cuts, and bruises are possibilities, even on relatively easy trails. Knowing basic first aid is crucial. A twisted ankle far from civilization can quickly turn a day hike into a multi-day ordeal. Being prepared for minor injuries can prevent them from escalating into major problems.
Essential Safety Equipment for Beginner Hikers
It’s better to be over-prepared than under-prepared, especially when venturing into the wilderness. Here’s a list of essential items for beginner hikers:
A well-stocked first-aid kit is your best friend on the trail. It should include bandages, antiseptic wipes, pain relievers, blister treatment, and any personal medications. Don’t forget a whistle for signaling in case of emergency. A map and compass (or GPS device with downloaded maps, and the knowledge to use them!) are crucial for navigation. A headlamp or flashlight is vital if your hike extends into the evening.
Sturdy hiking boots are a must, and don’t forget plenty of water and high-energy snacks.
Strategies for Staying Safe on the Trail
Safety isn’t just about gear; it’s about smart decisions.
Hiking with a buddy is always recommended, especially for beginners. Having someone to share the load, offer support, and assist in an emergency is invaluable. Always inform someone of your hiking plans, including your route, estimated return time, and who you’re with. This allows someone to raise the alarm if you don’t return as scheduled. Carrying a fully stocked first-aid kit is not enough; knowing how to use it is equally important.
Take a basic first-aid course before your adventures.
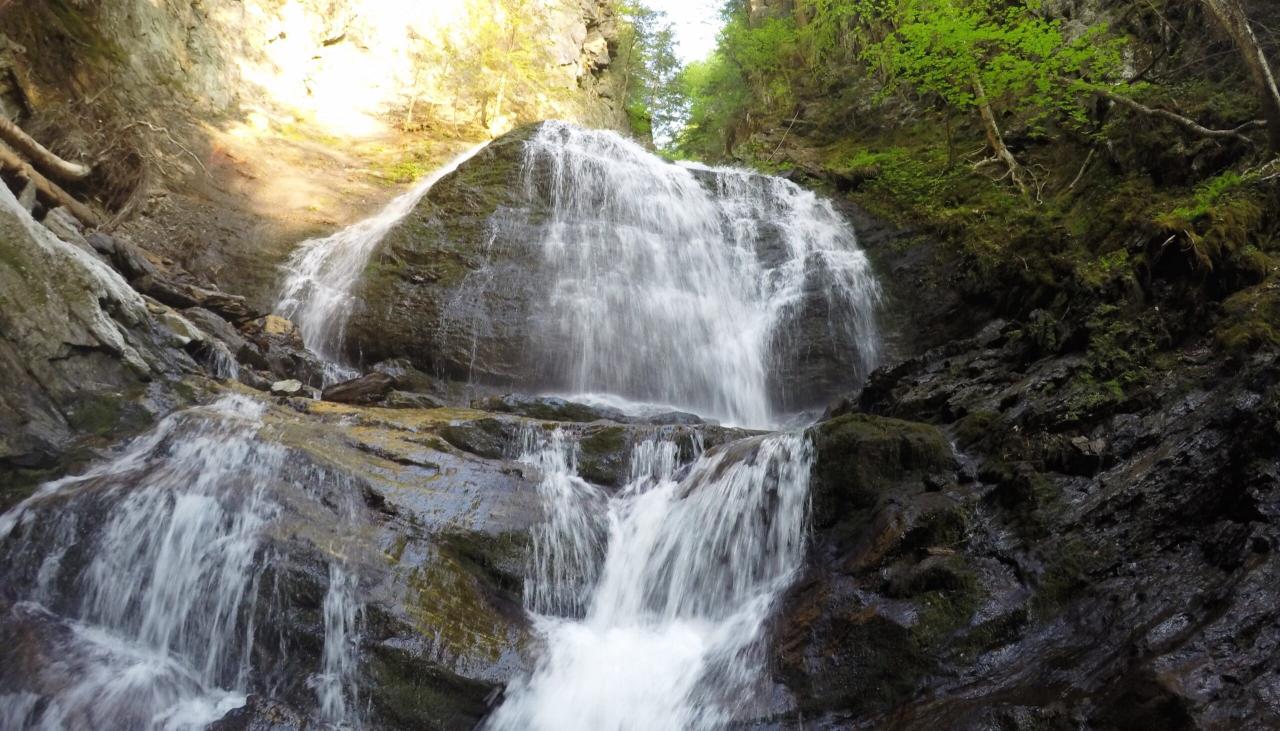
Illustrating a Beginner-Friendly Hike

Prepare yourself for a whimsical journey on the delightfully named “Whispering Pines Trail,” a beginner-friendly path perfect for those taking their first tentative steps into the world of hiking. Forget Everest; this is more “Everest-lite,” a charming stroll through nature’s gentler side.This trail is a delightful introduction to the joys of hiking, boasting a gentle incline and a mostly flat terrain, making it ideal for those new to the activity.
The scenery is a feast for the senses, a symphony of sights, sounds, and smells.
Trail Description and Stages
The Whispering Pines Trail unfolds in three distinct, yet seamlessly connected, stages. The initial stage begins at a charmingly rustic trailhead, nestled amongst a cluster of ancient oaks. The path gently winds upwards, revealing glimpses of the surrounding valley. Birdsong fills the air, a cheerful chorus accompanying your steps. This first section is relatively flat, allowing you to settle into a comfortable pace and enjoy the immediate surroundings.The middle stage introduces a slightly steeper incline, but nothing too strenuous.
When investigating detailed guidance, check out best places for a leisurely walk near me with nature views now.
Here, the path enters a dense forest of pine trees, their scent a refreshing and invigorating fragrance. Sunlight filters through the canopy, creating dappled patterns on the forest floor. This section culminates at a small, picturesque clearing, offering a stunning panoramic view of the valley below. Take a moment to breathe in the crisp air and marvel at the scenery.
You’ve earned it!The final stage is a gentle descent back to the trailhead. The path winds through a meadow filled with wildflowers, their vibrant colors a beautiful contrast to the green of the surrounding trees. The sounds of nature become more pronounced – the gentle buzzing of bees, the rustling of leaves, and the distant call of a hawk.
The trail eventually loops back to the trailhead, completing your enchanting journey.
Sensory Experience on the Whispering Pines Trail
Before embarking on your hike, consider what you might experience with your five senses:
- Sight: Lush green forests, vibrant wildflowers, dappled sunlight filtering through the trees, panoramic valley views, ancient oak trees at the trailhead.
- Sound: Birdsong, rustling leaves, buzzing bees, the gentle breeze whispering through the pines, the distant call of a hawk.
- Smell: The fresh, clean scent of pine needles, the sweet fragrance of wildflowers, the earthy aroma of damp soil.
- Touch: The soft texture of pine needles underfoot, the smooth bark of the trees, the cool, refreshing air on your skin, perhaps a gentle breeze.
- Taste: The refreshing taste of water from your reusable water bottle (remember to stay hydrated!). Perhaps even a delicious picnic lunch enjoyed in the picturesque clearing.
Post-Hike Considerations

So, you’ve conquered that beginner-friendly trail! Congratulations, intrepid explorer! But the adventure doesn’t end at the trailhead. Proper post-hike care is crucial for ensuring you feel fantastic and are ready for your next outdoor escapade. Think of it as the cooldown lap after a great race – essential for recovery and preventing future aches and pains.Proper hydration and nutrition are paramount to a successful hike, and their importance extends well beyond the trail’s end.
Neglecting these can turn a triumphant return into a grumpy, dehydrated slump.
Hydration and Nutrition After a Hike
Replenishing fluids lost through sweat is vital. Think of your body like a well-irrigated garden – without water, things start to wilt! Aim to drink plenty of water, even if you don’t feel particularly thirsty. Electrolyte drinks can also help replace lost salts and minerals. Don’t just reach for sugary sodas; those offer a temporary sugar rush followed by a crash.
Instead, opt for nutrient-rich foods that provide sustained energy. A hearty meal including lean protein, complex carbohydrates (think whole grains and fruits), and healthy fats will help repair muscles and replenish energy stores. Imagine refueling your hiking engine after a long journey – a nutritious meal is the premium fuel. For example, a grilled chicken salad with quinoa and avocado would be a fantastic post-hike feast.
Preventing Muscle Soreness and Treating Minor Injuries
Mild muscle soreness is common after a hike, especially if you’re new to the activity. Think of it as your muscles saying, “Wow, that was a workout!” Gentle stretching can significantly reduce soreness. Focus on the muscle groups you used most during your hike. A warm bath or shower can also help relax tense muscles. For minor injuries like blisters, clean the area thoroughly and apply a bandage.
Over-the-counter pain relievers can help manage discomfort, but if you experience significant pain or swelling, consult a doctor. Remember, prevention is key! Proper footwear and gradual increases in hiking difficulty will help minimize the risk of injury. For example, if you’ve developed a blister, applying a moleskin pad and keeping the area clean can help prevent further irritation.
Leave No Trace Principles
Leaving a trail cleaner than you found it isn’t just polite; it’s essential for preserving the natural beauty of our hiking areas for future generations. Pack out everything you pack in. This means all trash, food scraps, and even toilet paper. Dispose of waste properly in designated receptacles or pack it out if none are available. Stay on marked trails to minimize environmental impact and protect delicate vegetation.
Avoid disturbing wildlife, and leave rocks and plants exactly as you found them. Imagine the trail as a shared space, a beautiful canvas that everyone deserves to enjoy. Leaving it pristine ensures everyone can appreciate the natural wonders. For example, instead of leaving your banana peel on the ground, pack it out in a sealable bag.
Ultimate Conclusion
So, lace up those boots, grab your water bottle (and maybe a camera to capture those Insta-worthy moments), and get ready to explore! Remember, hiking isn’t just about reaching the destination; it’s about savoring the journey, one breathtaking vista and satisfyingly crunchy leaf at a time. With a little planning and our handy guide, you’ll be conquering those beginner trails and feeling like a seasoned pro in no time.
Now go forth and hike!