
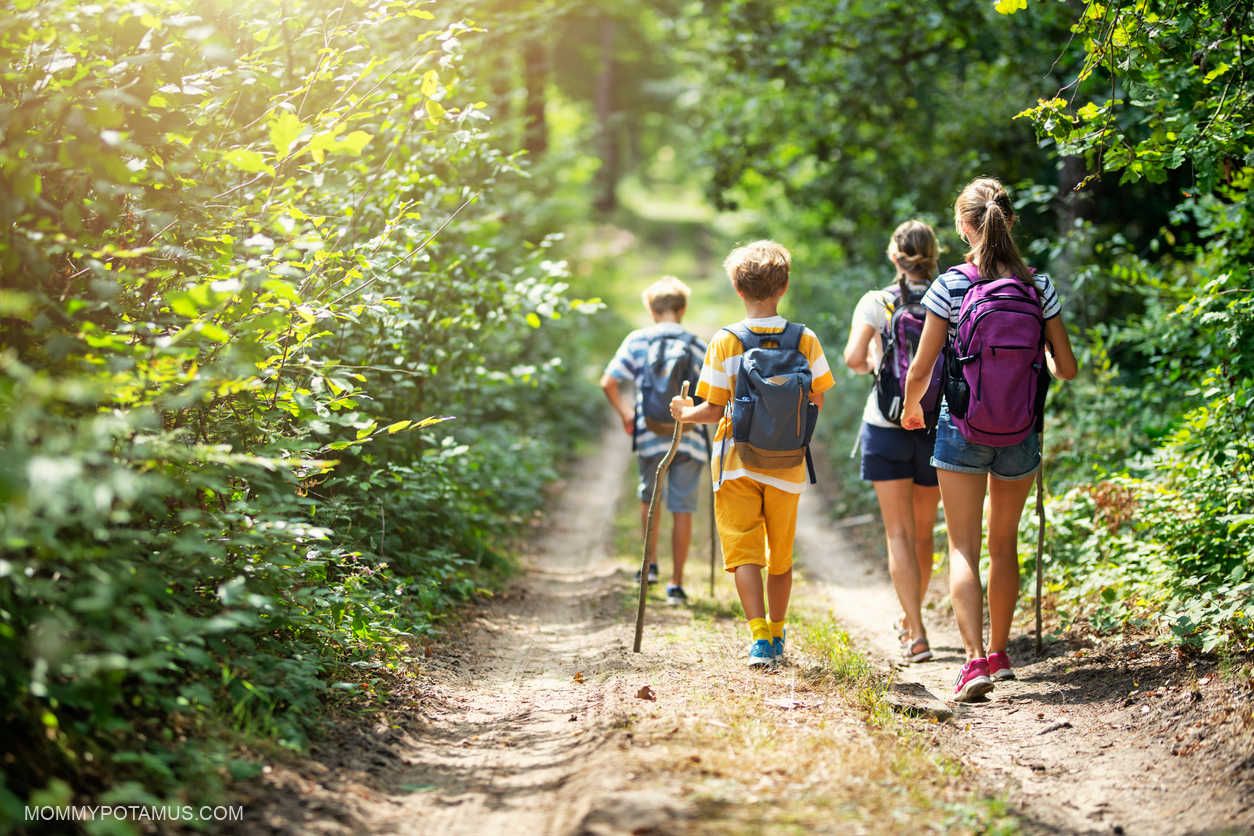
Family-friendly hiking trails near me with kids: Forget the grumpy toddler tantrums and embrace the wonder of nature! This isn’t your average slog up a mountain; we’re talking about crafting unforgettable family adventures on trails that even the littlest hikers will conquer (or at least attempt to conquer with adorable determination). Think breathtaking views, giggling fits, and maybe even a surprisingly delicious trail snack or two.
Get ready to trade screen time for tree time, and discover the magic of the outdoors as a family.
Finding the perfect trail requires a bit of detective work, but fear not! We’ll equip you with the tools and tips to navigate the world of trail-finding apps, decipher trail difficulty ratings, and pack like seasoned outdoor pros. From choosing the right gear to keeping the kids entertained (because let’s be honest, even the most stunning scenery can get old after a while), we’ll cover it all.
So grab your hiking boots, pack the snacks, and let’s get this family adventure rolling!
Finding Local Trails
So, you’re ready to ditch the screens and embrace the great outdoors with your little adventurers? Fantastic! But before you hit the trail, a little planning can transform a potential meltdown into a memory-making family hike. Finding the perfect path for your brood requires a bit of digital detective work, but fear not, intrepid explorer! We’ve got you covered.Finding the perfect trail for your family requires a bit of online sleuthing.
Luckily, there are plenty of resources available to help you discover hidden gems near you, ensuring a fun and safe adventure for everyone. The key is knowing where to look and what to look for.
Trail-Finding Websites and Apps
Several websites and apps specialize in helping outdoor enthusiasts locate trails. Using these resources effectively involves knowing how to refine your search to focus on family-friendly options. This ensures you don’t end up on a trail that’s too strenuous or unsuitable for younger hikers.
Here are a few popular options:
- AllTrails: A comprehensive database with user reviews, photos, and trail maps. It’s known for its detailed information and excellent filtering options.
- Hiking Project: Similar to AllTrails, Hiking Project offers a vast collection of trails with user-submitted data, including difficulty ratings and elevation profiles.
- TrailLink: Focuses primarily on trails suitable for biking and walking, many of which are ideal for families with younger children.
Refining Your Trail Search, Family-friendly hiking trails near me with kids
To ensure you find a trail suitable for your family, use specific s in your searches. Think beyond just “hiking trails near me.” Try these examples:
- “easy hiking trails near [your city/town] with kids”
- “short family-friendly trails near [your location]”
- “paved trails near me suitable for strollers”
- “trails with waterfalls near [your location] easy”
Comparison of Trail-Finding Resources
Here’s a quick comparison of three popular resources:
| Name | Features | Ease of Use | Cost |
|---|---|---|---|
| AllTrails | Detailed maps, user reviews, photos, elevation profiles, filtering options | Very easy, intuitive interface | Free (with premium options) |
| Hiking Project | Comprehensive trail database, user-submitted data, difficulty ratings | Easy to use, similar to AllTrails | Free |
| TrailLink | Focus on paved trails, good for biking and walking, often family-friendly | Easy to navigate, good for finding accessible trails | Free |
The Importance of Checking Trail Reviews
Before committing to a hike, always, always,always* check the reviews! Think of them as your virtual scouting party. Reviews offer invaluable insights into trail conditions, potential hazards (like steep drop-offs or slippery rocks), and the overall suitability for families with children. Pay attention to comments about trail maintenance, accessibility, and the presence of amenities like restrooms or picnic areas.
Do not overlook the opportunity to discover more about the subject of easy hiking trails with breathtaking views near me.
A few negative reviews shouldn’t necessarily deter you, but they can help you prepare and manage expectations. For example, a review mentioning a particularly muddy section might prompt you to pack extra boots or consider an alternative trail.
Assessing Trail Difficulty and Suitability

Choosing the right hiking trail for your family can be an adventure in itself! But before you lace up those tiny hiking boots, it’s crucial to assess the trail’s difficulty to ensure a fun, safe, and memorable experience for everyone, especially the little ones. A poorly chosen trail can quickly turn a family outing into a grueling ordeal.Assessing a trail’s suitability for young children involves carefully considering several key factors.
These factors work together to determine whether a particular trail is appropriate for your family’s hiking abilities and the ages of your children. Failing to consider these aspects can lead to disappointment, exhaustion, and even potential safety hazards.
Discover how challenging mountain hikes with stunning vistas nearby has transformed methods in this topic.
Factors Affecting Trail Suitability for Young Children
Trail difficulty isn’t just about how steep the climb is; it’s a multifaceted consideration. Elevation gain, trail length, and terrain type all play a significant role in determining a trail’s suitability for young children. A seemingly short trail with a steep incline can be far more challenging than a longer, flatter trail. Similarly, rocky or uneven terrain can be more difficult for little legs to navigate than a smooth, paved path.
When investigating detailed guidance, check out top-rated hiking trails with minimal crowds near me now.
The overall condition of the trail—presence of obstacles, exposure to the elements, and availability of shade—are also crucial factors to assess. Remember, a child’s stamina and attention span are finite resources!
Discover how camping cooking pots has transformed methods in this topic.
Trail Difficulty Checklist for Parents
Before embarking on your hike, use this checklist to evaluate the trail’s suitability for your family:
- Elevation Gain: How much vertical climbing is involved? A gradual incline is generally better than a steep ascent. Consider the ages and fitness levels of your children.
- Trail Length: How long is the trail? Keep it realistic considering your children’s stamina and attention spans. A shorter trail with the option to turn back is preferable to a longer, more committing hike.
- Terrain Type: Is the trail paved, dirt, rocky, or a combination? Paved trails are easiest, while rocky trails are the most challenging. Consider whether your children can handle the terrain.
- Trail Conditions: Are there any obstacles like roots, rocks, or water crossings? These can pose challenges for young children and require extra attention.
- Shade and Exposure: How much sun exposure is there? Hiking on a hot, sunny day can be exhausting, especially for young children. Look for trails with adequate shade.
- Water Availability: Is there access to water along the trail? Dehydration can be a serious concern, especially during warmer months.
- Rest Stops: Are there suitable spots for rest breaks along the trail? Regular breaks are essential for young children.
Comparing Physical Demands of Different Trail Types
Different trail types present varying degrees of physical challenge. Paved trails are generally the easiest, requiring minimal effort and suitable for even the youngest hikers. Dirt trails offer a slightly more challenging experience, requiring better balance and potentially more stamina. Rocky trails, however, demand significantly more physical effort, balance, and coordination, making them less suitable for very young children.
Trail Difficulty and Suitable Ages
The following table provides a general guideline for matching trail difficulty to appropriate age ranges. Remember, these are just suggestions, and individual children’s abilities may vary.
| Difficulty Level | Trail Description | Suitable Ages (Years) |
|---|---|---|
| Easy | Paved, flat, short distance, minimal elevation gain. Examples: Nature trails in parks, boardwalks. | 2+ |
| Moderate | Dirt trail, gentle inclines, moderate distance, some elevation gain. Examples: Well-maintained forest trails, shorter mountain trails with gradual ascent. | 5+ |
| Difficult | Rocky terrain, steep inclines, long distance, significant elevation gain. Examples: Mountain trails with significant elevation changes, trails with challenging obstacles. | 10+ (with appropriate experience and preparation) |
Planning the Hike: Family-friendly Hiking Trails Near Me With Kids
Planning a family hike is like orchestrating a tiny, adorable, mud-loving orchestra. Every instrument (child) needs to be considered, and the conductor (you) needs a solid plan to ensure a harmonious, enjoyable experience for all. Failing to plan is planning to fail, and nobody wants a hike ending in tears (except maybe the grumpy toddler who refused to wear waterproof boots).A hike’s duration and distance must be carefully chosen based on the youngest and least experienced hiker’s abilities.
Underestimating their stamina can lead to whining, complaining, and potential meltdowns (imagine a tiny human-sized volcano erupting on a scenic mountain path). Overestimating, on the other hand, might lead to exhaustion and resentment. Finding the sweet spot involves a bit of trial and error, but observing your children’s pace and tolerance during previous shorter walks will be a great guide.
Remember, it’s better to err on the side of caution – a shorter, more enjoyable hike is far superior to a longer, miserable one.
Explore the different advantages of how to make money online for beginners that can change the way you view this issue.
Sample Half-Day Family Hike Itinerary
This itinerary assumes a family with children aged 5-10, adjusting timings based on your family’s specific needs.
Enhance your insight with the methods and methods of places to hike near me with camping opportunities.
- :00 AM: Arrival at the trailhead. Apply sunscreen, double-check everyone has water bottles, and do a quick potty break. (Avoid that mid-hike emergency!)
- :30 AM – 9:30 AM: Gentle start to the hike. Keep the pace slow and steady, allowing plenty of time for photo stops and nature exploration. Kids love finding sticks, leaves, and rocks!
- :30 AM – 9:45 AM: First break! Enjoy a snack, refill water bottles, and let the kids run around a bit.
- :45 AM – 11:00 AM: Continue the hike, perhaps incorporating a small game like “I Spy” to keep them engaged.
- :00 AM – 11:30 AM: Second break! This time, maybe a small picnic with sandwiches and fruit.
- :30 AM – 12:00 PM: Finish the hike, heading back to the trailhead at a relaxed pace.
- :00 PM: Celebrate a successful hike with well-deserved ice cream!
Packing List for a Family Hike
Careful preparation is key to a smooth and enjoyable hike. This packing list divides items into essentials and options, depending on your specific needs and the trail’s conditions.Essential Items:
- Plenty of water (more than you think you’ll need!)
- Snacks (see below for suggestions)
- First-aid kit (band-aids, antiseptic wipes, pain relievers)
- Sunscreen
- Insect repellent
- Appropriate footwear for everyone (hiking boots or sturdy shoes)
- Layers of clothing (weather can change quickly)
- Map and compass/GPS (or a downloaded trail map on your phone)
- Whistle (for emergencies)
- Trash bags (pack out everything you pack in)
Optional Items:
- Camera
- Binoculars
- Small backpack for each child
- Portable charger for phones
- Wet wipes
- Hand sanitizer
- Small toys or games to keep kids entertained during breaks
- A blanket for picnics
Snacks and Water: Fueling the Adventure
Bringing enough snacks and water is crucial to keep everyone’s energy levels up and prevent meltdowns. Dehydration and hunger can quickly turn a fun hike into a miserable one. Think of snacks as tiny bursts of hiker happiness.Suitable snack options include:
- Trail mix (nuts, seeds, dried fruit)
- Fruit (apples, bananas, oranges)
- Energy bars
- Sandwiches or wraps
- Crackers and cheese
Remember to choose snacks that are easy to pack, non-messy, and appealing to children. And of course, plenty of water! Water bottles should be refilled regularly, especially on warmer days. Consider bringing a hydration pack for longer hikes.
Safety Considerations

Hiking with kids is a blast, but let’s be smart about it! A little preparation goes a long way in ensuring a safe and enjoyable adventure for everyone. Remember, even the most idyllic trail can present unexpected challenges, so it’s crucial to be prepared for anything Mother Nature – or a mischievous squirrel – might throw your way.Potential Hazards and Risk MitigationUnexpected encounters with wildlife are a possibility on any trail.
While most animals are more afraid of you than you are of them, it’s best to maintain a respectful distance. Keep a safe distance from all animals, especially those with young. Never approach or feed them. If you encounter a bear, for instance, make yourself look large, speak firmly, and slowly back away. For smaller creatures like snakes, admire them from afar and avoid direct contact.
Weather changes can also be a significant factor. Check the forecast before you go and be prepared for sudden shifts in temperature or unexpected rain. Pack layers of clothing and a waterproof jacket. If a storm rolls in, seek shelter immediately. Injuries are another potential hazard.
Stumbles, falls, and minor cuts are common occurrences. Proper footwear and preparedness will reduce risk.Appropriate Footwear and ClothingThe right gear is crucial for a safe and comfortable hike. Sturdy, well-fitting hiking boots or shoes with good ankle support are essential to prevent sprains and blisters. Avoid sandals or flip-flops! Dress in layers to adapt to changing weather conditions.
Moisture-wicking fabrics will keep you dry and comfortable. A hat is vital for sun protection, and sunglasses will shield your eyes from the glare. Remember to apply sunscreen regularly.First-Aid Procedures for Minor InjuriesImagine this: A small scrape on a knee. First, clean the wound gently with clean water and antiseptic wipes. Then, apply a thin layer of antibiotic ointment to help prevent infection.
Cover the wound with a clean bandage. For a more serious injury, like a sprain, follow the RICE method: Rest, Ice, Compression, and Elevation. Rest the injured area, apply an ice pack wrapped in a thin cloth for 15-20 minutes at a time, apply a compression bandage to reduce swelling, and keep the injured limb elevated above the heart.
Remember, for anything beyond minor scrapes and bumps, seek professional medical attention. This illustration, while textual, aims to show the systematic approach to basic first-aid.Emergency Contact InformationAlways carry a fully charged cell phone, even if you’re only going on a short hike. Program emergency contacts into your phone, including local emergency services (911 in the US), a family member or friend, and park rangers if applicable.
Consider writing down this information on a piece of paper and keeping it separate from your phone, in case your phone is lost or damaged. For example, your list might include: 911, John Doe (555-1212), Jane Doe (555-3434), Park Ranger Station (555-5656).
Obtain recommendations related to nearby hiking trails with minimal elevation gain that can assist you today.
Enhancing the Hiking Experience
Transforming a family hike from a simple trek to an unforgettable adventure requires a dash of creativity and a sprinkle of planning. The key is to engage everyone, regardless of age or hiking experience, fostering a sense of wonder and shared accomplishment. By incorporating fun activities and educational elements, you can create memories that will last a lifetime – and maybe even inspire a lifelong love of the outdoors.Keeping children engaged and entertained on a hike can feel like herding cats up a mountain, but with the right approach, it’s entirely achievable.
The secret lies in making the experience interactive and exciting, turning a potentially monotonous walk into a thrilling expedition.
Nature Scavenger Hunts and Storytelling
A nature scavenger hunt is a fantastic way to keep little ones occupied and focused. Prepare a list of items to find – a specific type of leaf, a feather, a particular rock formation, a certain kind of insect (observed, not captured!). Award small prizes upon completion, or simply the satisfaction of completing the challenge. Alternatively, weave a captivating story into the hike.
Let the trail itself be the backdrop for an imaginative tale, with trees becoming magical beings and rocks transforming into mythical creatures. This storytelling approach can easily adapt to various age groups, adjusting the complexity and narrative style accordingly.
Educational Activities During Hikes
Integrating educational elements into a hike effortlessly transforms it into a learning experience. For instance, teach children how to identify different types of trees by their leaves, bark, or shape. Point out various plants and discuss their uses or interesting facts about them. A magnifying glass can turn a seemingly ordinary stone into a fascinating microcosm, revealing hidden textures and details.
Discuss local history; if the trail passes by a landmark, tell its story – even a simple anecdote can pique children’s interest. This hands-on learning makes education fun and memorable.
Catering to Different Age Groups
Accommodating various age groups on a single hike necessitates flexibility and careful planning. For younger children, shorter distances and frequent breaks are crucial. Incorporate games like “I Spy” or nature-themed charades to keep them engaged. Older children might appreciate a more challenging route and the opportunity to learn more advanced concepts about nature or local history. The key is to adapt the pace and activities to each child’s capabilities and interests, ensuring everyone feels included and challenged appropriately.
Consider breaking the hike into smaller segments with different activities planned for each segment to keep everyone engaged and prevent fatigue.
Capturing Memorable Photos and Videos
Instead of simply snapping a picture, take the time to create a visual narrative. Capture details – the sunlight filtering through the leaves, a child’s delighted expression as they spot a butterfly, the texture of the bark on an ancient tree. Describe the sounds – the rustling of leaves, the chirping of birds, the gentle rush of a nearby stream.
Describe the smells – the earthy scent of the forest floor, the fresh scent of pine needles. These descriptive details will bring your photos and videos to life long after the hike is over, allowing you to relive the experience vividly. Consider short video clips capturing the highlights, such as children crossing a stream or discovering interesting natural formations.
Don’t just record the action; narrate the moment, adding context and emotion to the footage.
Conclusive Thoughts

So there you have it – your guide to conquering the great outdoors with your little adventurers! Remember, the most important ingredient for a successful family hike isn’t the perfect trail, but the shared experiences and memories created along the way. Embrace the unexpected detours, the spontaneous giggles, and the occasional mud puddle splash. After all, a little bit of dirt never hurt anyone (except maybe your laundry).
Happy hiking!